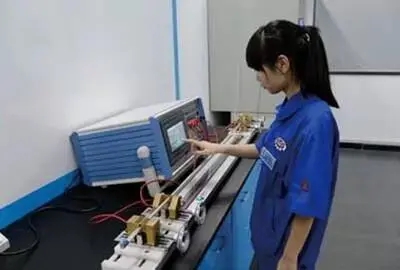
Cable resistance testing process:
1、 Sample preparation
1. Lay the wires and cables to be tested straight and carefully check for any damage, mechanical scratches, cracks, damages, etc. If any abnormalities are found, repair or replacement is necessary.
2. Peel off a certain length of insulation layer at both ends of the wire and cable to be tested, and seal the exposed metal part with insulation tape to prevent external impurities from contaminating or corroding, resulting in inaccurate test results.
3. Confirm the identification and serial number of the sample and record it.
2、 Test steps
1. Connect the electrode interfaces of the testing instrument to the metal conductors at both ends of the wires and cables to be tested.
2. Set the parameters of the testing instrument, including measurement range, current, etc., and turn on the power.
3. After the test command appears, start recording the resistance value.
4. After recording the test, turn off the power and disconnect the test instrument from the wires and cables to be tested.
3、 Test results
The test results of insulation resistance are given in numerical form, usually in megaohms. The test results should include both raw and processed data.